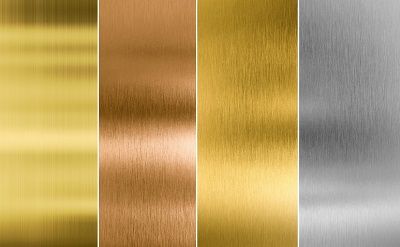
Metals are great not only because they are versatile and can be easily formed into many different shapes, but also because you can easily incorporate other elements with them. For example, brass surfaces are not only good for being a base for stones and other accessory elements, but also for engraving.
This is, in fact, a very common practice especially for jewelleries and name plates. The material of brass is perfect for this particular work because it is able to display the text or engraved marking clearly and visibly, even from afar.
Engraving Metals
Brass, copper, bronze, silver, gold—all these metals can technically be engraved upon. It could be of an intricate design or an elegant calligraphy of an initial. Whatever the design, it is sure to come out looking very sophisticated.
If you are looking to expand your skills working with metal, you may want to consider this particular craft. Of course, a primary requirement here is for you to have easy access to the materials, such as engraving brass, among others.
How to Engrave
Depending on your skill set—and how steady your hand is—you can actually opt to manually engrave on the metal. If you’re looking for a bigger mass production type of project, you might want to consider investing in an actual laser machine to get things done much faster. It should save you not only time but actual manpower, since engraving is no walk in the park.
Getting right material, such as the engraving brass, is important because you want the metal to feature a thickness that is just right for the process. If you observe items like brass plates, plaques, signages, or even trophy plates, you’ll see that they usually come in .020” and .025” in thickness. There are also others that come at a much thinner 0.16” thickness, and is also popular for its ease of use.
Mix N’ Match
The great thing about brass as an engraving material is that it is flexible enough to be combined with other materials. This is important if you want your engraving to have a sort of illusion of depth to give the engraving more character.
The deeper the etching is, too, the better the visual quality of the material. If you are looking to make signages, you’d want to achieve this effect so that the text can be easily seen even from afar. Whatever the message is, it’s going to be more effectively delivered through the engraving brass.
Engraving Tool
Even with the engraving metal, you’re not going to accomplish much without the engraving too. If you’re going to do this by hand, a pneumatic graver is the right tool for you. It is easily held by hand, fitting into your palm, and easy to push and drive to the metal to achieve desired effect.
Do take note that there are different kinds of graver tips. If you’re new at handling this kind of tool, the square “V” cut should be a good tool to start getting familiar with. Apart from these gravers, of course, you can also rely on the good ol’ hammer and chisel, or even a compass point or craft knife.
Ready the Surface
First wipe clean the surface f the metal with a damp cloth, followed by a dry one. Expect engraving brass to have a coating of protective layering, which the engraving tool will cut through to, so make sure to re-apply a new coating finish after your task. You want the material’s color and appearance to remain consistent so make sure to go over the particular engraved area for finishing.
Before you get started, get in touch with a reputable metals supplier like Rotax Metals so you can have the proper material for your project.
Sources:
Engraving Brass How-To: Beginners and Hobbyists. JockeyJournal.com.
Commonly Asked Engraving Questions. EngraveCon.com.


