By

Rotax Metals

How to Engrave Metal and Other Interesting Facts

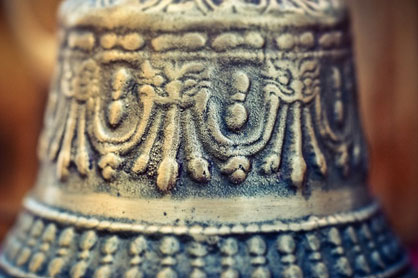
engraved bronze bellEver wondered how the images and texts on coins are made? Or perhaps the print on some of the items in the rare books and manuscripts section in your library? Those are the work of a process called engraving, which involves the incision of intricate designs on a hard, usually flat surface that serves as either an impression or the output itself. Metals are the most commonly used material for this application thanks to their rigidity and durability.

A Brief History

Engraving has been practiced as early as the beginning of the first millennium B.C.E. as evidenced by the designs of jewelry that dates to that period, which predominantly consist of shallow grooves on surfaces. Before artisans of the ancient times learned the art of engraving, they first used more traditional methods, such as lost-wax casting and chasing, to create designs on jewelry pieces.

In lost-wax casting and chasing, the designs are made by casting metal instead of engraving it, hence the name. A model is made out of wax, clay, or any moldable material. Then a mold made of a rigid outer layer and a softer inner one made of the original wax model. Molten wax is again poured into the mold and swished around to achieve an even coating on the surface of the mold. When the mold is smooth enough, the parting line or flashing where the pieces of the mold came together are slowly chased. Several other processes follow until an output is obtained.

While this method is still vastly practiced in modern-day metalworking, engraving into metal has become a more popular alternative since its discovery in the first century B.C.E. at least in cutting decorative figures on metal and glass surfaces. Products of engraving continued to appear for over 400 years since then but production eventually stalled sometime in the fifth century.

During the Middle Ages, goldsmiths in Europe started using engraving to decorate metalwork and print impressions of their designs for record-keeping purposes. This gave birth to the practice of producing artistic images on paper using engraved copper printing plates. Engraving became the main technique used for reproducing artworks until the advent of photography in the late 1800s.

Intaglio vs. Relief

Printing techniques can be classified according to which section of the matrix (the mold used to cast text and images on an object’s surface) the design is engraved and holds the ink. A technique is called intaglio printing if the image is incised into a surface and the incised line or sunken area holds the ink. It’s called relief printing if the protruding section of the matrix is the one that holds the ink.

The recessed area on the matrix can be created either by etching or by engraving. In etching, the metal plate to be turned into a matrix is pre-covered with an acid-resistant coating. The design or image is engraved on the coating to expose the metal surface. Acid is then methodically applied on the exposed area of the metal to corrode it until the desired design appears. In engraving, no corrosive substance is involved. The design or its negative is manually engraved on the surface of the metal plate using a burin.

How to Engrave Metal

The first step to engraving brass, copper, and other malleable and ductile metals is knowing the different tools you can use and understanding how they work. You should also know which types of metal are ideal for engraving or simply, which ones your tools can cut comfortably. The main tool used by engravers to cut metal engraving designs is called burin or graver. This tool is generally made of steel or other alloys that are harder than the metal plate to be cut. Those that do engrave metal pieces may find some sections of their material inaccessible in which case they employ engraving machines to help them out.

Burins come in different shapes and sizes, each of which produces different kinds of lines. Depending on the intricacy of the design you would like to cut on your metal piece, you might need several types of gravers. As for you metal piece, you have to make sure that it’s soft enough for the tools and machines you’re going to use. Otherwise, your graver might break. If the point of your burin breaks even on a microscopic level, it will become hard to control. Fortunately, there’s an array of metals that you can engrave, including silver, nickel, steel, brass, gold, and even titanium.

Most metal engraving how to tips you’ll find online make the process look so easy but in truth, it takes skills and creativity to actually engrave designs with both accuracy and precision. Even with the aid of automatic hand-pieces that only require controlled push, the odds of applying excessive pressure is too high for those who don’t have enough training and experience.

Apart from knowing how to do metal engraving, you must also know how to choose your metal plate. When it comes to that, a different set of skills and experience is required. Thankfully, if you go to prominent copper and brass suppliers like Rotax Metals, you’ll get all the help you need from metal experts in order to pick the perfect metal for your project. In their catalog you’ll find an entire section of metals that are suitable for engraving. They can even help you identify the metals that might damage your tools.

Sources:

https://www.ehow.com/how_4843464_engrave-metal.html

How to Clean Copper Metal: The Homeowner’s Guide to Removing Tarnish

Muntz Metal

According to the U.S. Geological Survey, copper is the third-most consumed industrial metal worldwide, trailing only aluminum and iron. In fact, it wouldn’t be surprising if you had something made of copper in your home right now. Since copper is highly prized for its durability and brilliant shine, it is commonly used in wiring for electrical components, plumbing, cookware, and utensils.

Over time, however, copper will begin to lose its shine and you may begin to notice that sections are starting to become discolored. This is called “tarnish” and it happens because of a natural chemical reaction between copper and oxygen. As a result, copper items begin to look dull. Luckily, this process can be reversed with a little effort on your part-–and the best part is that you can easily do this with everyday items you already have laying around at home.

How do you clean copper metal using household items? Here is a step-by-step guide to help you clean copper, remove tarnish, and make these copper items look like the day you bought them:

1. Identify if the object is lacquered or unlacquered

Due to copper’s propensity to oxidate and tarnish, some manufacturers may decide to add a protective layer to copper objects (lacquered). Before you can start with the actual cleaning, it’s definitely a good idea to check if the object in question has this protective coating or not. This is important because your cleaning method will change based on the object’s finish. This guide will focus on unlacquered copper.

If you have a lacquered copper item, but you’ve noticed that the coat is starting to break down, you may opt to remove the coating and turn the item in question into unlacquered copper. This will allow you to follow the rest of the steps without worry.

2. Determine the extent of the tarnish present on the surface

Next, you’ll need to take a good look at the tarnish present of the copper surface. Not all tarnish are “created equal”. Older items that have been left unmaintained for long periods of time, will have more stubborn tarnish. If this is what you have on your hands, try washing the surface with a special mixture first.

Take a cup of vinegar, four cups of water, a tablespoon of salt. Place this all in a large pot and bring to a boil. Once the water is boiling, place the copper item inside the pot. The vinegar will help “soften” the tarnish on the surface, making it easier to remove in the next step. Generally, you want to soak the copper for a good thirty minutes to an hour to give the vinegar enough time to work its magic.

3. Identify the homemade cleaning agent you want to try

As the cleaning agent boils, now is the perfect time to set up the cleaning solution you want to try. Although there are different types of cleaning solutions for copper, the three methods outlined below are equally effective at cleaning copper sheet metal. Given this, simply choose which one is more convenient for you to make at home:

Fresh Lemon and Salt

Take a fresh lemon out of your refrigerator, as well as some salt (rock, table salt, etc.). Slice the lemon in half, while placing some salt in a small container for easy access. Grab the lemon, dip it in the container with the salt, and start slowly rubbing the lemon slice over the surface of the copper item. If you’re running a little low on lemon juice, squeeze the lemon lightly to release more juice.

Vinegar and Salt

Grab a relatively large container for this method. Pour ¼ cup of salt and vinegar into the container. Make sure that the salt is completely dissolved prior to applying it to the surface of the copper. Once the salt is dissolved, use a clean cloth to apply the cleaning solution to the copper item. When cleaning the tarnish off of the copper, make sure to slowly clean it using long, circular motions for the best results.

Ketchup

Ketchup is more than just something we can put on our hot dogs, burgers, and fries. The use of ketchup in cleaning certain metals has long been documented. This is because the acidic content of ketchup is just enough to loosen up tarnish, making it easier to remove. All you have to do is squirt a bit of ketchup onto a clean rag and start cleaning the surface. It’s that simple!

4. Rinse the copper item under running water

Regardless of how you chose to clean copper metal, all three methods mentioned above will leave some form of residue on the copper items. Make sure you run the copper item under running water to clean up any residue. Otherwise, the residue will only attract more dirt, resulting in the copper becoming tarnished faster. After you’ve washed it, wick away excess moisture with a clean towel or microfiber cloth.

What Is Metal Shearing and What Are Its Advantages over Other Cutting Methods?

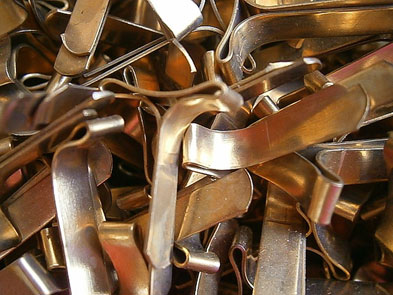
a pile of sheared copper stripsOne of the greatest discoveries of the last millennium is the true cause of earthquakes. Until the 18th century, even the most celebrated scientists in history thought earthquakes are created by explosions of flammable materials deep underground. Such conjecture, along with many others, was immediately debunked when Reverend John Mitchell proposed that earthquakes were caused by rock movements (plate tectonics sliding against each other), which is followed by the propagation of elastic waves within the earth. Those rock movements were later discovered to be a form of “shearing”.

Shearing occurs when an object’s parallel internal surfaces slide past one another, resulting in a breakage. The shear stress that enables this occurrence is often created by two opposite external forces pushing the object from both sides. Shearing, however, isn’t always the destructive force that creates earthquake. It has many beneficial uses, too. One particular industry that greatly benefits from the power of shearing is metal manufacturing. For the longest time, shearing has been one of the most widely used methods for cutting metals.

What is Metal Shearing?

There are numerous techniques manufacturers use for cutting metals, including grinding, turning, and drilling. Some are assisted with laser, high-speed waterjet, and heat. Each of these techniques suit specific applications. For instance, for making intricate sculptures, waterjet cutting is the best bet due to its flexible settings. Some techniques, however, such as metal shearing, prove more efficient than others, which is why they are mostly employed in mass productions. So what is shearing in metal work?

Also known as die cutting, metal shearing is the process of cutting straight lines on a metal die or stock by forcing two blades past each other. The metal shearing process is similar to how scissors work except all points along the edges of both blades meet at the same time. Sometimes, though, the blades can be mounted at an angle to reduce the shearing force required. The ultimate goal in shear cutting is to prevent the formation of chips and eliminate the need for burning or melting, which badly affects the properties of the metal die. Metal shearing is the preferred cutting method of most bronze and brass suppliers, such as Rotax Metals, whose products come in sheets or plates.

Characteristics and Tool System

Metal shearing can be characterized by the blurred, slightly deformed straight line it creates. For this reason, it is not an effective method for creating fine cuts, let alone for cutting intricate designs on metal plates. If anything, metal shearing is just the first step of a multifarious, elaborate metal working process, which often involves other metal cutting techniques.

There are several types of tool systems used in the shearing of metal. One allows for the shearing of sheet metal and plate using a squaring or bow tie shear. Another shears angle materials. And the last one shears bar stock using a bar shear. Any aluminum and copper sheet supplier should know these main tools along with other more specialized shearing tools and which applications each of them can be effectively used for.

How does a metal sheer work?

A metal shear consists of different working parts. It has two blades—a moving blade, called punch, and a fixed blade, called die. The punch pushes the workpiece against the die until a clearance of 5% to 40% of the thickness of the metal is reached. Clearance is the distance between the point where the cutting takes places and the point where the sheared side of the metal totally separates from the other side.

It’s important to note that the clearance has a major impact on both the quality of the cut and the machine’s energy efficiency. Insufficient clearance may result in the two parts of the stock still slightly attached, which usually entails manual prying to separate them. Too much clearance, on the other hand, may lead to roll-over or heavy burring, which is just as damaging to the metal.

Benefits of Metal Shearing

Apparently, there are many benefits to the shearing metal process. In fact, they are the reasons why this technique isn’t going to be faced out anytime soon despite the introduction of more advanced metal cutting techniques. Here are some of them.

1. It makes straight line cuts in flat sheet stock with cleaner edges than those done by traditional torch cutting.
2. It doesn’t create chips on the metal.
3. It doesn’t require heating or melting, which preserves the metal’s property.
4. It produces minimal to no kerf.
5. No loss of material, which equates to minimal waste.
6. It is a cost-effective option for high-output operations.

When you see all of these features in the metal supplies that you are purchasing for your project, you can easily tell that they have been sheared. Most manufacturers use metal shearing so you’ll definitely see a lot of products made through this process in metal supply stores, especially from a copper sheet supplier and other stores that specialize in soft metals. Just be careful when choosing your supplier as not all of them get their materials from reliable sources.

Sources:

http://www.advantagefabricatedmetals.com/shearing-process.html

https://www.britannica.com/science/shear-stress

1 9 10 11 12 13 153

Product categories